


Document Actions
gvSIG-Desktop 1.1. Manual de usuario.
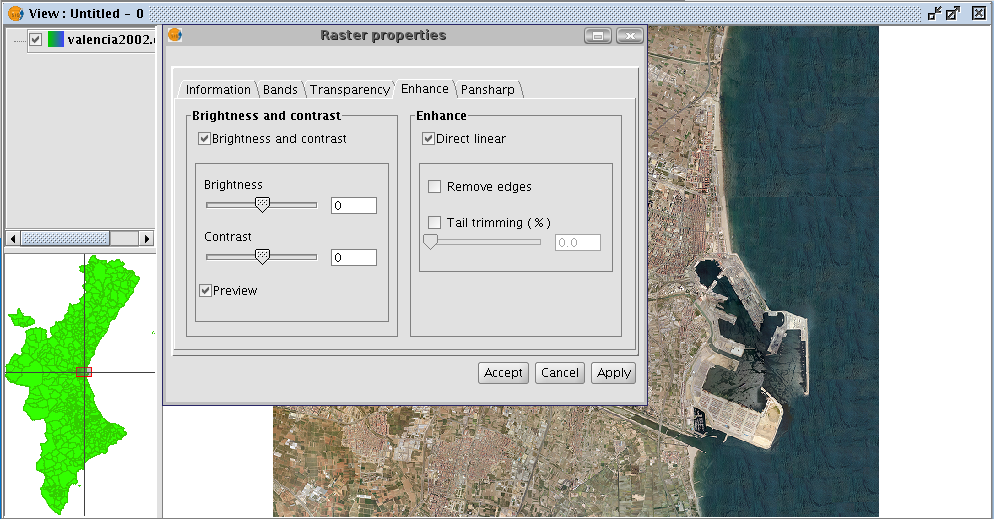
Applying “Brightness and Contrast” and “Enhance” filters to raster images. Firstly, load the cartography in raster format in a view and right click on the name of the raster layer selected in the ToC.
When the menu appears select the “Raster properties” option.

Then go the “Enhance” tab.
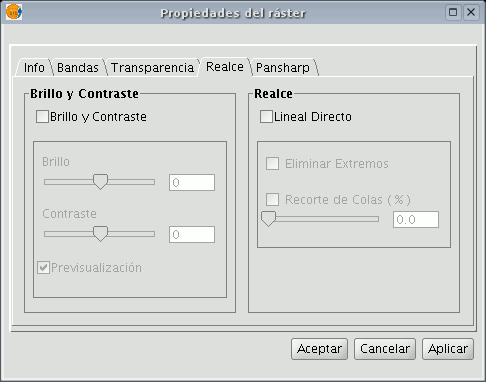
You will see that the “Brightness and contrast” and “Enhance” adjustment panels are disabled by default. These panels can be enabled by checking the boxes at the top of each panel.
If these check boxes are disabled no filters will be applied to the image even though the values have been input into the panel.
If, at any time, any of these filters have been applied to the image, the values will appear in the panel.
You will find two slider controls in the “Brightness and contrast” panel.
Values can be modified by using the slider or by directly inputting the values in the numerical field on the right and pressing “Enter”.
The brightness and contrast increase range goes from -255 to 255. To fine tune these values without having to input them in the numerical field, click one end of the slider control to either increase or decrease the value, unit by unit.
You will find a “Preview” check box in the panel. This is useful for obtaining a preview of the image without having to “Accept” or “Apply” changes every time they are made. If this check box is enabled, the image is refreshed with the new filters when the mouse button is released after modifying the brightness or contrast values using the slider control or when “Enter” is pressed if the numerical field has been used to modify the value.

When brightness and contrast filters are applied the previous image takes on the above appearance.
When “Cancel” is pressed, no changes are applied and the input values are lost.
If you press “Accept” and you return to “Raster properties” you will see that the previously input values have been saved.


